
The dr gupta gelatin recipe has gained attention among home cooks and dessert enthusiasts for its simplicity, reliability, and consistently smooth results. Whether you are preparing a light dessert, a layered treat, or a base for creative culinary experiments, understanding this recipe sets a strong foundation for success. Unlike complicated gelatin techniques that require advanced skills, this method focuses on precision, balance, and a few key principles that guarantee a perfect texture every time.
At its core, the dr gupta gelatin recipe is about controlling hydration, temperature, and timing. These three elements determine whether your gelatin turns out silky and firm or ends up grainy and unstable. Many people struggle with gelatin because they rush the blooming process or overheat the mixture, but with the right approach, those issues become easy to avoid.
Curious about the gelatin trend linked to weight loss and whether it truly delivers results? Discover the facts and how it’s used in this guide Kelly Clarkson Gelatin Weight Loss Does It Really Work.
Why This Gelatin Recipe Stands Out
One of the main reasons this recipe has become so popular is its consistency. It removes guesswork and provides a repeatable process that works across different applications. Whether you are making a classic dessert mold or incorporating gelatin into mousses and creams, the results remain dependable.
Another advantage is versatility. The dr gupta gelatin recipe can be adapted for sweet or savory dishes. From fruit based desserts to chilled custards, it acts as a neutral base that enhances texture without overpowering flavor. This makes it especially valuable for anyone looking to expand their dessert making skills at home.
Understanding the Basics Before You Begin
Before diving into the process, it is important to understand what gelatin actually does. Gelatin is a protein derived from collagen, and when properly dissolved and cooled, it forms a delicate structure that traps liquid, creating that signature wobble.
To achieve the perfect outcome, keep these essentials in mind:
- Always bloom gelatin in cold water first
- Never boil gelatin, as high heat weakens its setting ability
- Stir gently to avoid incorporating air bubbles
- Allow enough time for proper setting in the refrigerator
These fundamentals are what make the dr gupta gelatin recipe reliable, even for beginners.
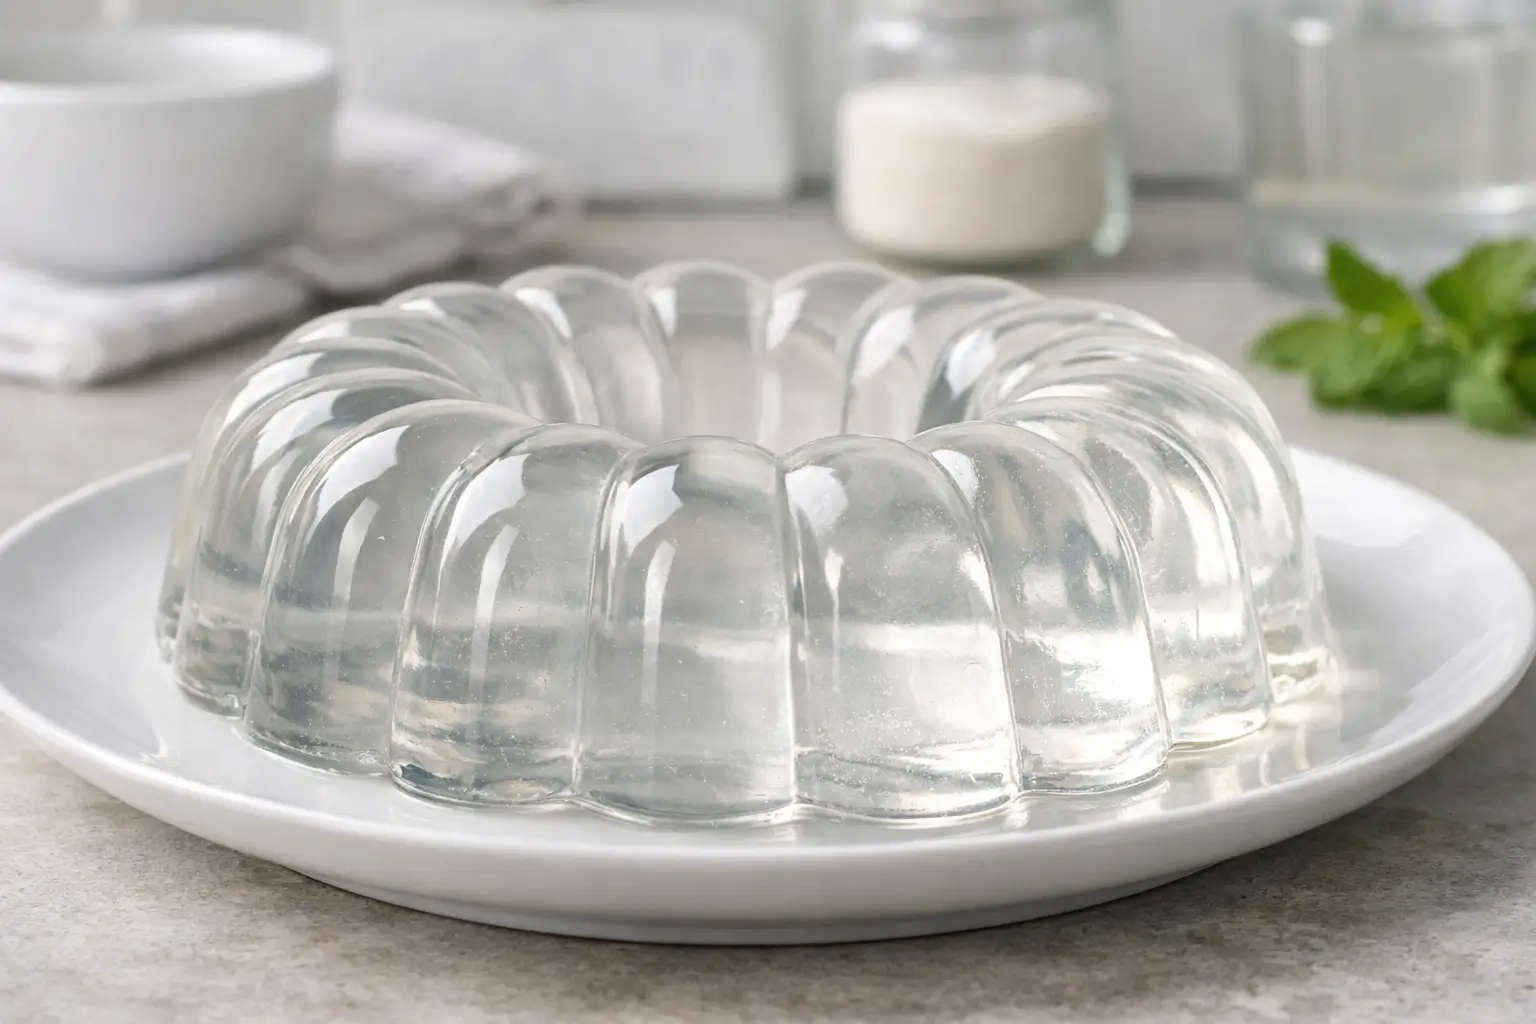
What You Can Expect From This Recipe
When done correctly, this recipe produces a smooth, clear, and firm gelatin with a pleasant texture. It should hold its shape when unmolded yet feel soft and delicate when eaten. There should be no lumps, no rubbery consistency, and no separation.
This balance is what sets apart a well executed gelatin dish from an average one. Once you master this technique, you can confidently experiment with flavors, colors, and presentations.
Essential Ingredients and Tools for the Dr Gupta Gelatin Recipe
Creating a flawless dr gupta gelatin recipe begins with selecting the right ingredients and understanding how each component contributes to the final texture and structure. While gelatin itself is the star, the supporting ingredients and tools play an equally important role in achieving that smooth, firm, and visually appealing result.
Choosing the Right Ingredients for Perfect Gelatin
The simplicity of this recipe is one of its strengths, but precision matters. Each ingredient must be measured correctly and used at the right stage to ensure success.
Gelatin Powder or Sheets
Gelatin is available in two main forms: powdered and sheet gelatin. For the dr gupta gelatin recipe, powdered gelatin is the most commonly used because it is easy to measure and widely available in the United States.
High quality unflavored gelatin ensures a clean taste and consistent setting. Always check the expiration date, as older gelatin may lose its strength and affect the final texture.
Cold Water for Blooming
Cold water is essential for blooming gelatin. This step allows the granules to absorb moisture evenly before being heated. Skipping or rushing this step often leads to lumps or uneven texture.
Use filtered water when possible to maintain clarity, especially if you are making a clear or lightly colored gelatin dessert.
Sweetener or Flavor Base
Depending on your preference, you can use granulated sugar, honey, or even fruit juice as the flavor base. The dr gupta gelatin recipe works well with a variety of sweeteners, allowing you to customize the taste.
For fruit based versions, avoid fresh pineapple, kiwi, or papaya unless they are cooked first, as natural enzymes in these fruits can prevent gelatin from setting properly.
Flavor Enhancers
Vanilla extract, citrus zest, or natural fruit purees can elevate your gelatin from basic to exceptional. These additions should be incorporated after the gelatin has fully dissolved to preserve their aroma and taste.
Tools You Need for Consistent Results
Using the right tools makes the process smoother and helps you avoid common mistakes. You do not need professional equipment, but a few reliable kitchen items are essential.
Measuring Cups and Spoons
Accurate measurements are critical for the dr gupta gelatin recipe. Too much gelatin creates a rubbery texture, while too little results in a weak structure that does not hold its shape.
Heat Safe Bowl
A heat resistant bowl is needed to dissolve the bloomed gelatin gently. This allows for controlled heating without risking overheating.
Saucepan
A small saucepan helps you warm the liquid portion of the recipe. Keep the heat low to maintain control and prevent boiling.
Whisk or Spoon
A whisk or spoon is used to stir the mixture smoothly. Gentle stirring is key to avoiding air bubbles that can affect the appearance.
Molds or Containers
Choose molds based on your desired presentation. Silicone molds work well for easy unmolding, while glass dishes are ideal for simple serving.
Preparing Your Workspace for Success
Before you begin the dr gupta gelatin recipe, take a moment to organize your ingredients and tools. This step reduces stress and ensures a smooth workflow.
Measure everything in advance, keep your tools within reach, and clear enough space to work comfortably. Gelatin requires attention to timing, so being prepared helps you stay in control throughout the process.
Step by Step Method for the Dr Gupta Gelatin Recipe
Now that your ingredients and tools are ready, it is time to execute the dr gupta gelatin recipe with precision. This section walks you through each step in detail so you can achieve a smooth, firm, and perfectly set gelatin every time. Success here depends on patience and careful temperature control rather than complexity.
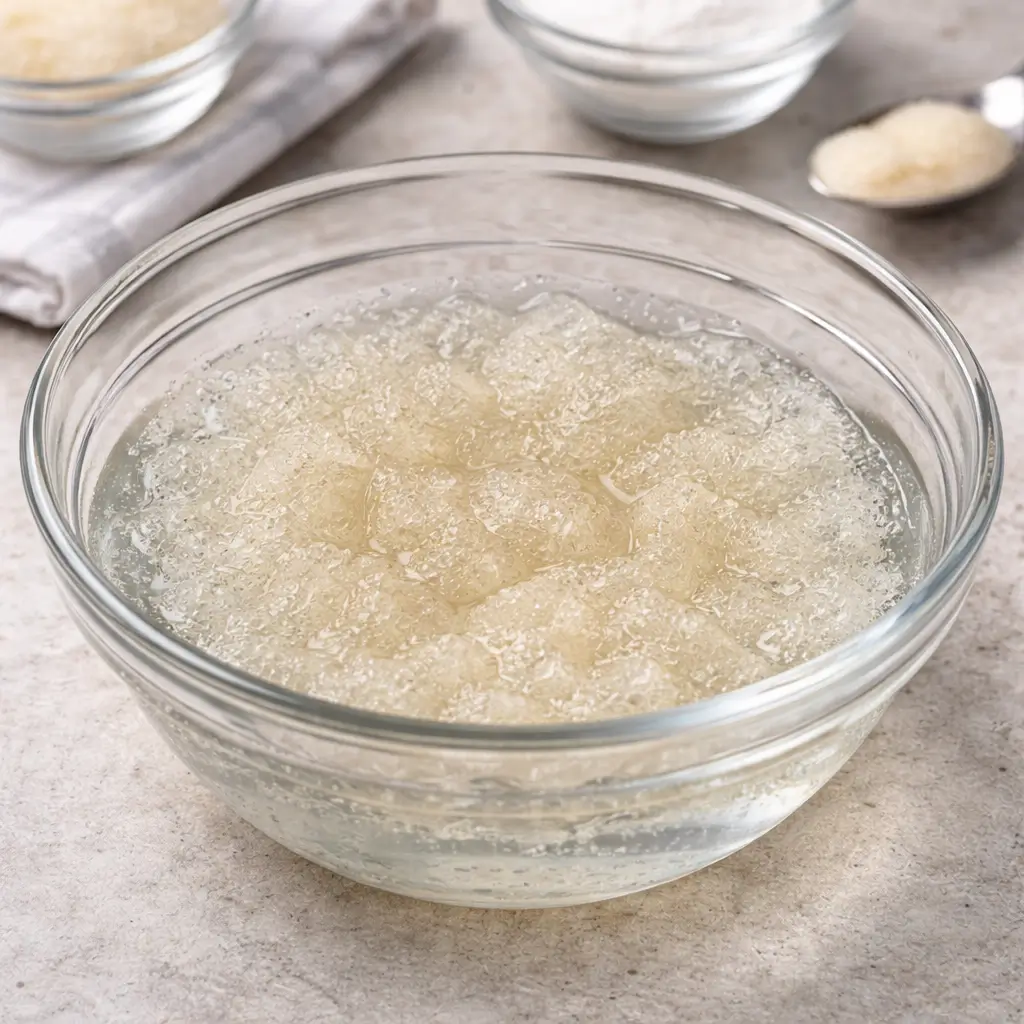
Step 1: Blooming the Gelatin Properly
Blooming is the most critical step in the entire dr gupta gelatin recipe. It ensures that the gelatin hydrates evenly before being dissolved.
How to Bloom Gelatin Correctly
Start by placing your measured cold water into a bowl. Sprinkle the gelatin powder evenly across the surface. Do not dump it in one spot, as this can cause clumping.
Let it sit undisturbed for about five to ten minutes. During this time, the gelatin will absorb the water and swell into a thick, sponge like texture. This stage is essential for achieving a lump free final product.
Step 2: Heating the Liquid Base
While the gelatin blooms, prepare your liquid base. This could be water, fruit juice, or a flavored mixture depending on your variation of the dr gupta gelatin recipe.
Controlling Heat for Best Results
Pour the liquid into a saucepan and heat it over low to medium heat. The goal is to warm the liquid until it is hot but not boiling. Boiling can weaken gelatin and affect its ability to set properly.
If you are adding sugar, stir it in during this stage so it dissolves completely.
Step 3: Dissolving the Gelatin
Once the liquid is warm and the gelatin is fully bloomed, it is time to combine them.
Achieving a Smooth Mixture
Add the bloomed gelatin into the warm liquid. Stir gently and continuously until the gelatin dissolves completely. This usually takes one to two minutes.
Make sure there are no visible granules left. The mixture should appear smooth and slightly glossy. Avoid vigorous stirring, as this can introduce air bubbles.
Step 4: Adding Flavor and Enhancements
At this stage, you can customize your dr gupta gelatin recipe with flavors.
When and How to Add Flavor
Remove the mixture from heat before adding delicate ingredients such as vanilla extract, citrus zest, or fruit purees. This helps preserve their natural aroma and taste.
Stir gently to incorporate everything evenly.
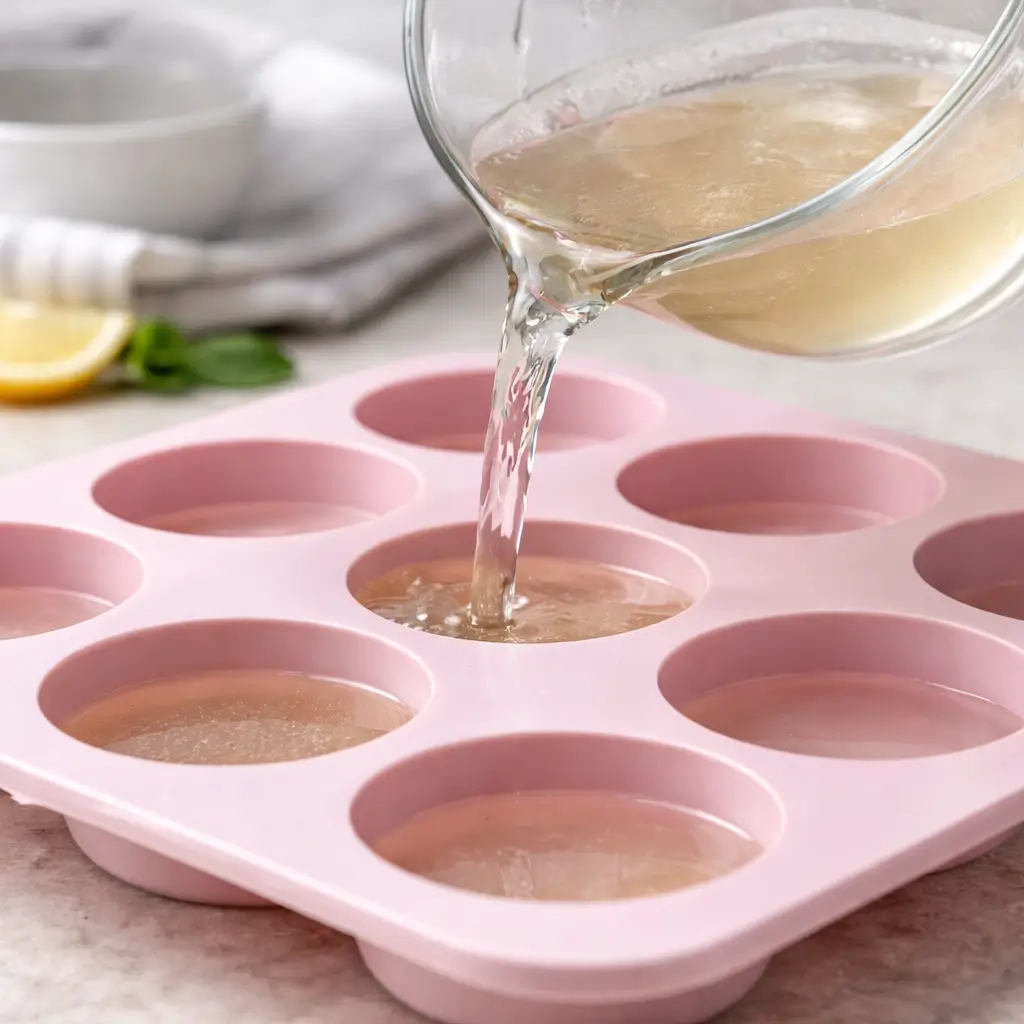
Step 5: Pouring and Setting the Gelatin
Carefully pour the mixture into your chosen molds or containers.
Tips for a Perfect Set
Allow the mixture to cool at room temperature for a few minutes before transferring it to the refrigerator. This prevents condensation and helps maintain clarity.
Place the molds in the refrigerator and let them set for at least four hours. For best results, leave them overnight.
Avoid moving the containers during the setting process, as this can disrupt the structure.
Step 6: Unmolding and Serving
Once fully set, your gelatin is ready to serve.
Easy Unmolding Technique
To release the gelatin from molds, briefly dip the bottom of the mold in warm water for a few seconds. Then gently invert it onto a plate.
The gelatin should slide out smoothly while holding its shape.
Common Mistakes to Avoid
Even with a reliable method like the dr gupta gelatin recipe, a few mistakes can affect the outcome:
Overheating the gelatin mixture can weaken its structure
Skipping the blooming step can cause lumps
Using incorrect ratios can lead to a rubbery or weak texture
Rushing the setting process can prevent proper firmness
By following each step carefully, you can avoid these issues and consistently produce high quality gelatin.
Creative Variations of the Dr Gupta Gelatin Recipe for Every Occasion
Once you have mastered the base technique, the dr gupta gelatin recipe becomes a powerful foundation for creativity. This is where simple gelatin transforms into visually stunning desserts and flavor packed creations that suit different occasions, seasons, and personal preferences.
The beauty of this recipe lies in its flexibility. With a few thoughtful adjustments, you can create elegant layered desserts, refreshing fruit gels, or even creamy indulgent treats that feel far more advanced than they actually are.
Fruit Based Gelatin Variations
Fruit gelatin is one of the most popular ways to customize the dr gupta gelatin recipe. It brings natural sweetness, vibrant color, and a refreshing taste that works especially well for warm weather or light desserts.
Using Fresh and Cooked Fruits
When working with fruit, it is important to understand how different fruits interact with gelatin. Fruits like strawberries, mangoes, and blueberries work beautifully in their natural form.
However, some fruits such as pineapple, kiwi, and papaya contain enzymes that can prevent gelatin from setting. To use these fruits successfully, cook them briefly to deactivate the enzymes before adding them to your mixture.
You can either blend fruits into a puree for a smooth texture or add small fruit pieces for a more dynamic presentation.
Juice Based Gelatin
Replacing water with fruit juice is another simple upgrade to the dr gupta gelatin recipe. Orange juice, apple juice, and grape juice are excellent choices.
For best results, choose juices without added pulp if you want a clear finish. This approach enhances flavor without complicating the process.
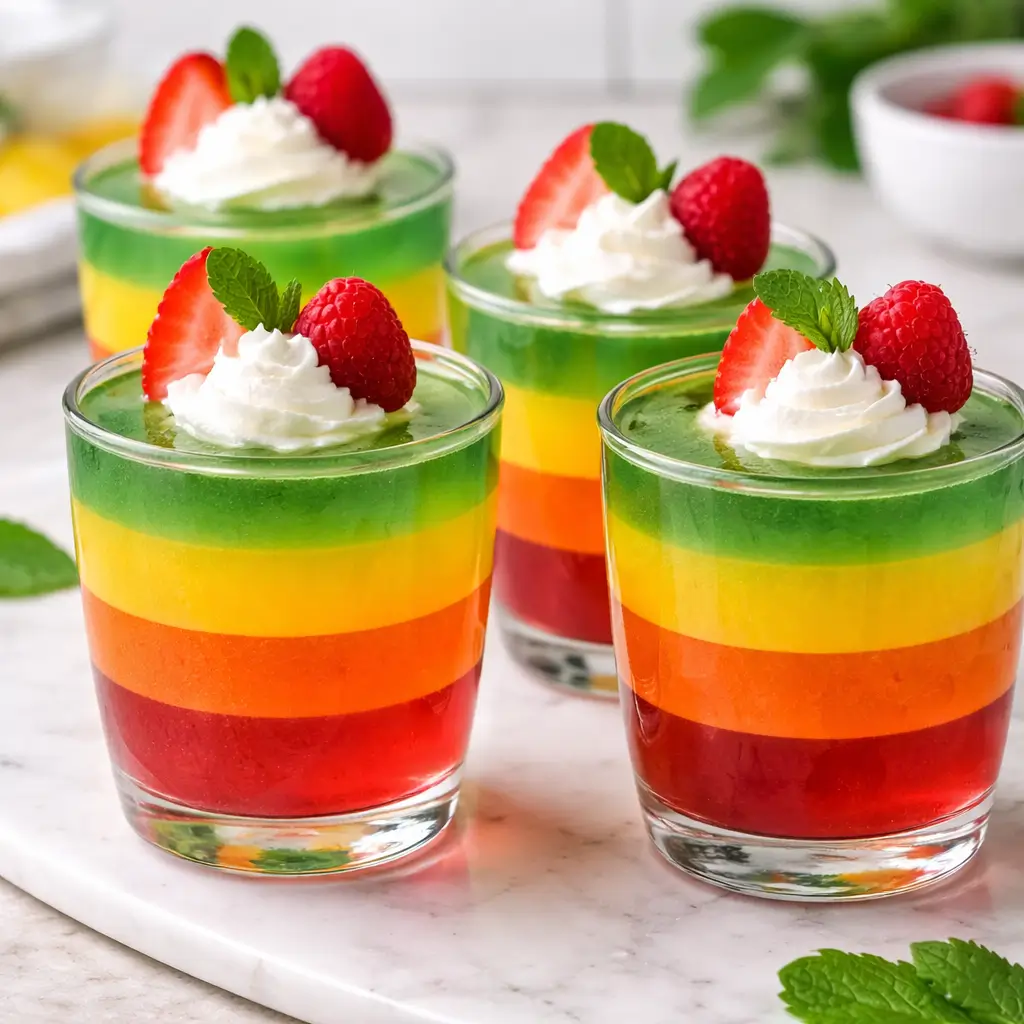
Layered Gelatin Desserts
Layered gelatin desserts are visually impressive and surprisingly easy once you understand timing.
Building Clean and Distinct Layers
To create layers, prepare one flavor at a time using the dr gupta gelatin recipe. Pour the first layer and allow it to partially set until firm but slightly tacky.
Then gently pour the next layer over it. This prevents mixing while helping the layers adhere to each other.
Repeat the process for as many layers as you like. Alternating colors and flavors creates a striking presentation that works well for parties and gatherings.
Creamy Gelatin Creations
Adding dairy transforms the dr gupta gelatin recipe into a rich and smooth dessert.
Incorporating Milk or Cream
To create a creamy version, replace part of the liquid with milk, half and half, or heavy cream. Sweeten the mixture slightly more to balance the richness.
Make sure the dairy is warmed gently before adding bloomed gelatin. This ensures proper dissolution and a silky texture.
You can also combine creamy layers with clear fruit layers to create a contrast in both flavor and appearance.
Low Sugar and Health Focused Options
For those looking to reduce sugar intake, the dr gupta gelatin recipe can be easily adapted.
Healthier Substitutions
Use natural sweeteners such as honey or maple syrup in moderation. You can also rely on the natural sweetness of fruit juices.
Another option is to create unsweetened gelatin and pair it with fresh fruit toppings. This approach keeps the dessert light while still satisfying.
Savory Applications of Gelatin
Although often associated with desserts, gelatin can also be used in savory dishes.
Expanding Beyond Sweet Recipes
The dr gupta gelatin recipe can be adapted with broths, herbs, and spices to create savory gels. These are often used in modern cuisine for plating and presentation.
For example, a lightly set herb infused broth can add elegance to appetizers or plated dishes.
Presentation Ideas That Elevate Your Dish
Presentation plays a major role in how your gelatin is perceived.
Simple Yet Elegant Serving Styles
Serve gelatin in clear glass cups to highlight layers
Use silicone molds for decorative shapes
Cut gelatin into cubes for fruit salads or dessert platters
Small presentation details can transform a basic recipe into something memorable.
By experimenting with these variations, you can take the dr gupta gelatin recipe far beyond its basic form and turn it into a versatile addition to your kitchen repertoire.
Expert Tips to Perfect the Dr Gupta Gelatin Recipe Every Time
Even though the dr gupta gelatin recipe is simple in structure, achieving consistently flawless results requires attention to detail. Small adjustments in technique can make a noticeable difference in texture, clarity, and overall presentation. This section focuses on professional insights that elevate your gelatin from good to exceptional.
Precision Makes All the Difference
One of the most overlooked aspects of gelatin preparation is measurement accuracy. Unlike many recipes where slight variations are forgiving, gelatin depends on balance.
Getting the Ratio Right
The ratio of gelatin to liquid determines firmness. Too much gelatin creates a dense, rubbery result, while too little leads to a weak structure that collapses.
For most applications, a balanced ratio creates a soft yet stable texture that holds its shape without feeling stiff. Once you understand this balance, you can adjust slightly depending on whether you want a delicate dessert or a firmer mold.
Temperature Control Is Critical
Temperature is one of the most important factors in the dr gupta gelatin recipe.
Avoiding Overheating
Gelatin should never be exposed to high heat once bloomed. Excessive heat breaks down its structure and weakens its ability to set. Always dissolve gelatin in warm liquid, not boiling liquid.
If your mixture accidentally reaches a boil, it is best to start over rather than risk a failed set.
Cooling at the Right Pace
Allowing the mixture to cool slightly before refrigerating helps maintain clarity and prevents condensation. Rapid temperature changes can sometimes create a cloudy appearance.
Achieving Crystal Clear Gelatin
Clarity is a hallmark of a well executed dr gupta gelatin recipe, especially for elegant desserts.
Techniques for a Clear Finish
Use filtered water or clear liquids
Avoid vigorous stirring that introduces air bubbles
Skim off any foam that forms on the surface before pouring
Pouring the mixture slowly into molds also helps reduce trapped air.
Timing the Setting Process
Patience is essential when working with gelatin.
How Long to Let It Set
While gelatin may appear set after a few hours, full structure develops over time. Allowing it to rest overnight in the refrigerator produces the best texture.
Avoid placing gelatin in the freezer to speed up the process. This can disrupt the structure and lead to uneven consistency.
Troubleshooting Common Problems
Even experienced cooks occasionally run into issues. Understanding how to fix them is key to mastering the dr gupta gelatin recipe.
Gelatin Did Not Set
This usually happens due to insufficient gelatin, overheating, or the use of enzyme rich fruits that were not cooked.
Solution: Reheat gently, add a small amount of properly bloomed gelatin, and reset.
Grainy or Lumpy Texture
This indicates that the gelatin was not fully dissolved.
Solution: Strain the mixture while warm to remove lumps and ensure smoothness.
Rubbery Texture
Too much gelatin or too little liquid can cause this.
Solution: Adjust the ratio in future batches and measure carefully.
Enhancing Flavor Without Compromising Texture
Balancing flavor and structure is an art.
Smart Flavor Pairings
Light citrus flavors enhance freshness
Vanilla adds warmth and depth
Berry flavors provide natural sweetness and color
Always add flavoring after removing the mixture from heat to preserve its quality.
Consistency Through Practice
Like any culinary technique, mastering the dr gupta gelatin recipe comes with repetition. Each time you make it, you will better understand how small changes affect the final result.
Keeping notes on your adjustments can help you refine your approach and develop your own preferred version of the recipe.
Final Thoughts on the Dr Gupta Gelatin Recipe
Mastering the dr gupta gelatin recipe opens the door to a wide range of culinary possibilities. From simple fruit desserts to elegant layered creations, this technique provides a reliable foundation that you can build on with confidence.
By understanding the importance of blooming, temperature control, and proper ratios, you can consistently produce gelatin that looks beautiful and tastes even better. With practice, creativity, and attention to detail, this recipe can become a staple in your kitchen.
Frequently Asked Questions About the Dr Gupta Gelatin Recipe
The dr gupta gelatin recipe is straightforward once you understand the basics, but many home cooks still have specific questions about technique, substitutions, and storage. This section addresses real concerns that often come up when preparing gelatin at home in a US kitchen.
Can I Use Gelatin Sheets Instead of Powder?
Understanding the Conversion
Yes, you can substitute gelatin sheets for powdered gelatin in the dr gupta gelatin recipe. Generally, one packet of powdered gelatin equals about four standard gelatin sheets.
Make sure to soak the sheets in cold water until softened, then gently squeeze out excess water before adding them to your warm liquid. The process is slightly different from powder but delivers equally smooth results.
How Do I Store Gelatin Properly?
Best Storage Practices
Once set, gelatin should be stored in the refrigerator, covered to prevent it from absorbing odors from other foods.
It typically stays fresh for up to five days. Keep it away from strong smelling items like onions or garlic to preserve its flavor.
Can I Freeze Gelatin?
Why Freezing Is Not Recommended
Freezing gelatin is not ideal. The freezing process breaks down the delicate structure, causing it to release water and become grainy once thawed.
For best results, always prepare gelatin fresh and store it in the refrigerator instead.
How Can I Make the Gelatin Recipe Vegetarian?
Alternative Options
Traditional gelatin is animal based, but you can replace it with plant based alternatives like agar agar or pectin.
Keep in mind that these substitutes behave differently. Agar agar sets more firmly and at room temperature, so you will need to adjust both the method and measurements when adapting the dr gupta gelatin recipe.
Why Is My Gelatin Cloudy Instead of Clear?
Causes and Fixes
Cloudiness is often caused by air bubbles, impurities in the liquid, or rapid cooling.
To fix this, use filtered liquids, stir gently, and allow the mixture to cool slightly before refrigerating. Straining the mixture before pouring can also improve clarity.
Can I Reduce Sugar in the Recipe?
Adjusting Sweetness Safely
Yes, you can reduce sugar or replace it with natural sweeteners. The structure of the dr gupta gelatin recipe will not be affected as long as the liquid ratio remains the same.
Taste your mixture before setting to ensure it meets your preference.
What Is the Ideal Texture for Perfect Gelatin?
Finding the Right Balance
Perfect gelatin should be firm enough to hold its shape but soft enough to melt smoothly in your mouth. It should not feel rubbery or overly stiff.
Achieving this balance comes down to accurate measurement and proper technique.
Can I Add Alcohol to Gelatin?
Tips for Alcohol Infusions
Yes, but in moderation. Alcohol can interfere with the setting process if used in large amounts.
Keep alcohol to a small percentage of the total liquid and combine it after the gelatin has dissolved but before pouring into molds.
dr gupta gelatin recipe
Ingredients
Method
- Pour cold water into a bowl and sprinkle gelatin evenly over the surface
- Let the gelatin bloom for 5 to 10 minutes until fully absorbed
- Heat remaining liquid in a saucepan over low heat until warm but not boiling
- Add bloomed gelatin to the warm liquid and stir gently until fully dissolved
- Stir in sugar until completely dissolved
- Remove from heat and add vanilla extract if using
- Pour mixture into molds or serving containers
- Let cool slightly, then refrigerate for at least 4 hours or until fully set
- Unmold gently or serve directly in containers
Notes
Always bloom gelatin properly to avoid lumps
Adjust sweetness based on your preference
Allow full setting time for best texture